Top 10 Tips for Setting Up an Ozark Trail Tunnel Tent
Setting up a tent can be a daunting task, especially if you’re not familiar with the process. However, with the right knowledge and preparation, setting up an Ozark Trail tunnel tent can be a breeze. In this article, we will provide you with the top 10 tips for setting up an Ozark Trail tunnel tent to ensure a smooth and successful camping experience.
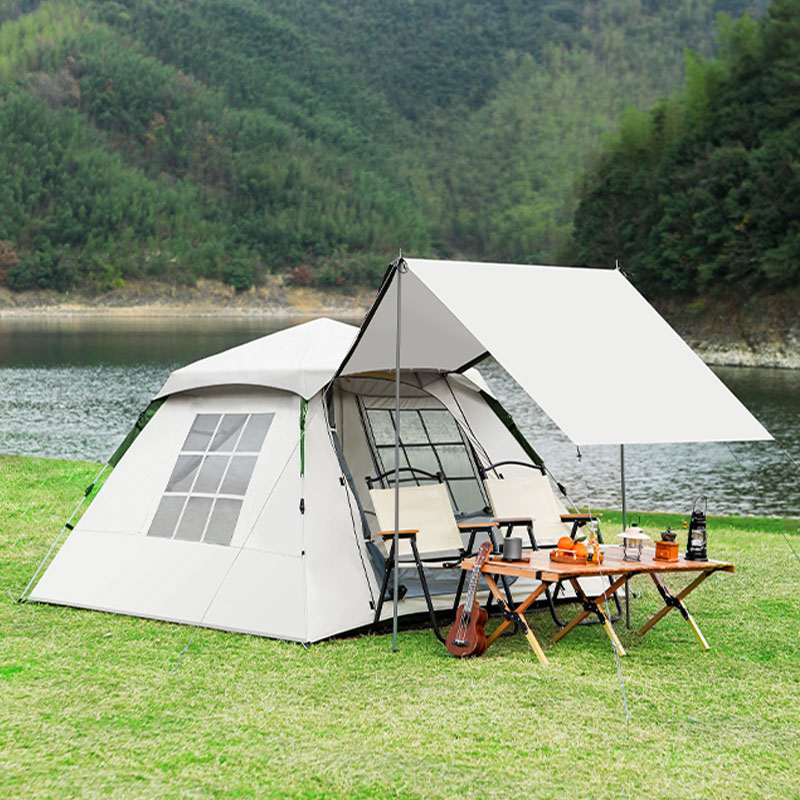
First and foremost, it is essential to choose a suitable location for your tent. Look for a flat and level surface free of rocks, sticks, and other debris that could potentially damage the tent floor. Additionally, consider the direction of the wind and position the tent so that the door is facing away from the wind to prevent it from blowing inside.
Before setting up the tent, make sure to lay out the tent body, rainfly, and ground tarp in the desired location. This will give you a clear idea of how the tent should be assembled and help you avoid any confusion during the setup process. It is also a good idea to familiarize yourself with the tent’s components and instructions before starting.
When assembling the tent poles, be sure to follow the manufacturer’s instructions carefully. Start by connecting the poles according to the designated color-coding or numbering system to ensure that they are assembled correctly. Once the poles are connected, insert them into the corresponding Sleeves or Clips on the tent body, making sure that they are securely in place.
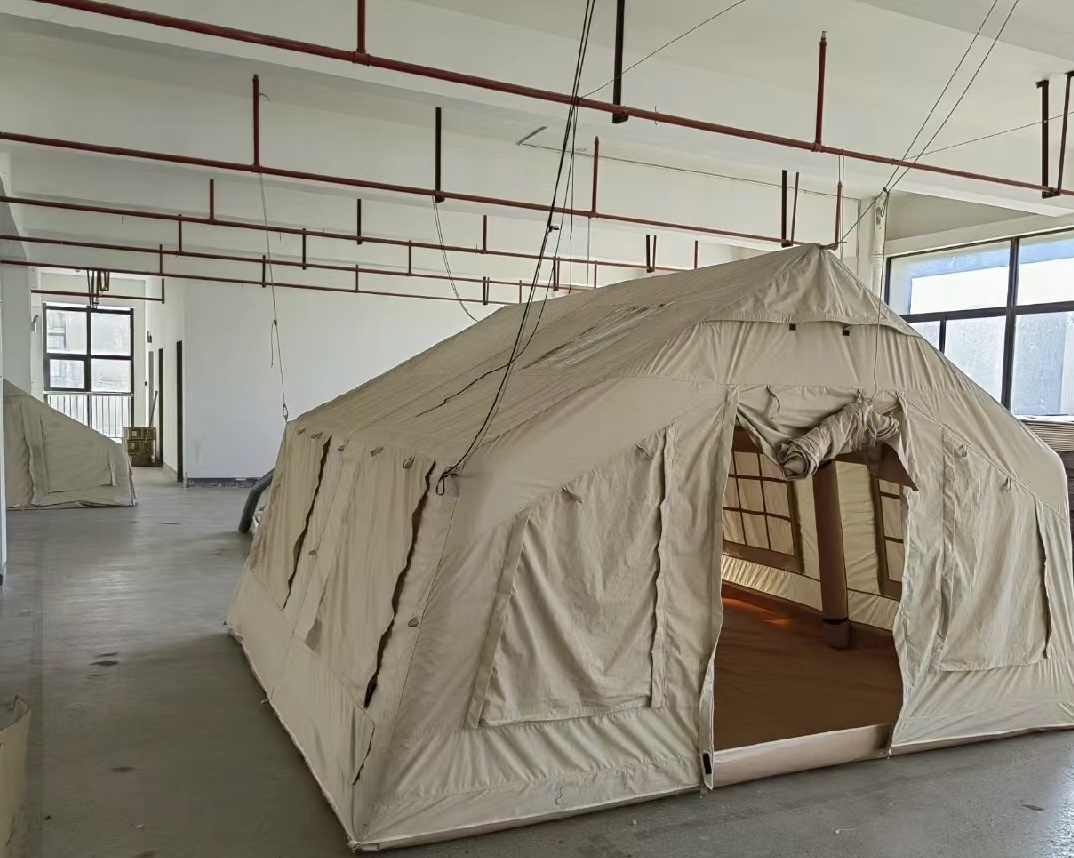
After the tent poles are in position, it’s time to raise the tent. Begin by lifting the tent body and extending the poles until they are fully extended and the tent is standing upright. Make any necessary adjustments to ensure that the tent is stable and secure before moving on to the next step.
Next, attach the rainfly to the tent body to provide additional protection from the elements. Secure the rainfly using the provided clips or straps, making sure that it is taut and properly aligned with the tent body. This will help prevent water from seeping through the seams and keep you dry during rainy weather.
Once the rainfly is in place, stake Down the tent using the provided stakes and guylines. Start by securing the corners of the tent with stakes and then move on to the guylines to provide additional stability in windy conditions. Be sure to pull the guylines tight and adjust them as needed to ensure that the tent is secure and properly anchored.
After staking down the tent, take the time to properly ventilate the tent by opening the windows and vents. This will help prevent condensation buildup inside the tent and keep the air circulating for a more comfortable camping experience. Additionally, consider using a ground tarp or footprint to protect the tent floor from wear and tear.
Finally, take a moment to inspect the tent for any potential issues or damage before settling in for the night. Check for tears, holes, or broken components that may need to be addressed before using the tent. By taking the time to properly set up and maintain your Ozark Trail tunnel tent, you can ensure a safe and enjoyable camping experience for years to come.
In conclusion, setting up an Ozark Trail tunnel tent doesn’t have to be a complicated process. By following these top 10 tips, you can easily and efficiently set up your tent for a successful camping adventure. Remember to choose a suitable location, familiarize yourself with the tent’s components, and follow the manufacturer’s instructions carefully to ensure a smooth setup process. With a little preparation and attention to detail, you can enjoy the great outdoors in comfort and style with your Ozark Trail tunnel tent.

 First and foremost, it is essential to choose a suitable location for your tent. Look for a flat and level surface free of rocks, sticks, and other debris that could potentially damage the tent floor. Additionally, consider the direction of the wind and position the tent so that the door is facing away from the wind to prevent it from blowing inside.
Before setting up the tent, make sure to lay out the tent body, rainfly, and ground tarp in the desired location. This will give you a clear idea of how the tent should be assembled and help you avoid any confusion during the setup process. It is also a good idea to familiarize yourself with the tent’s components and instructions before starting.
When assembling the tent poles, be sure to follow the manufacturer’s instructions carefully. Start by connecting the poles according to the designated color-coding or numbering system to ensure that they are assembled correctly. Once the poles are connected, insert them into the corresponding Sleeves or Clips on the tent body, making sure that they are securely in place.
First and foremost, it is essential to choose a suitable location for your tent. Look for a flat and level surface free of rocks, sticks, and other debris that could potentially damage the tent floor. Additionally, consider the direction of the wind and position the tent so that the door is facing away from the wind to prevent it from blowing inside.
Before setting up the tent, make sure to lay out the tent body, rainfly, and ground tarp in the desired location. This will give you a clear idea of how the tent should be assembled and help you avoid any confusion during the setup process. It is also a good idea to familiarize yourself with the tent’s components and instructions before starting.
When assembling the tent poles, be sure to follow the manufacturer’s instructions carefully. Start by connecting the poles according to the designated color-coding or numbering system to ensure that they are assembled correctly. Once the poles are connected, insert them into the corresponding Sleeves or Clips on the tent body, making sure that they are securely in place.
 After the tent poles are in position, it’s time to raise the tent. Begin by lifting the tent body and extending the poles until they are fully extended and the tent is standing upright. Make any necessary adjustments to ensure that the tent is stable and secure before moving on to the next step.
Next, attach the rainfly to the tent body to provide additional protection from the elements. Secure the rainfly using the provided clips or straps, making sure that it is taut and properly aligned with the tent body. This will help prevent water from seeping through the seams and keep you dry during rainy weather.
Once the rainfly is in place, stake Down the tent using the provided stakes and guylines. Start by securing the corners of the tent with stakes and then move on to the guylines to provide additional stability in windy conditions. Be sure to pull the guylines tight and adjust them as needed to ensure that the tent is secure and properly anchored.
After the tent poles are in position, it’s time to raise the tent. Begin by lifting the tent body and extending the poles until they are fully extended and the tent is standing upright. Make any necessary adjustments to ensure that the tent is stable and secure before moving on to the next step.
Next, attach the rainfly to the tent body to provide additional protection from the elements. Secure the rainfly using the provided clips or straps, making sure that it is taut and properly aligned with the tent body. This will help prevent water from seeping through the seams and keep you dry during rainy weather.
Once the rainfly is in place, stake Down the tent using the provided stakes and guylines. Start by securing the corners of the tent with stakes and then move on to the guylines to provide additional stability in windy conditions. Be sure to pull the guylines tight and adjust them as needed to ensure that the tent is secure and properly anchored.