Table of Contents
طرق إبداعية لزيادة مساحة التخزين باستخدام الرفوف المثبتة على الحائط
نصائح DIY لتثبيت وتنظيم رف المعاطف المثبت على الحائط
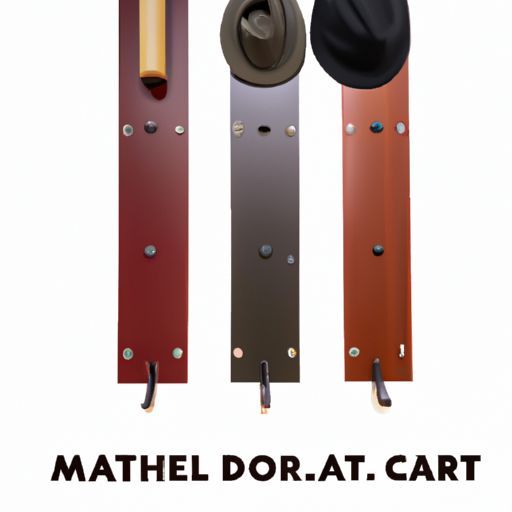
يمكن أن يكون تثبيت رف المعاطف المثبت على الحائط طريقة رائعة لإضافة الوظائف والتنظيم إلى مساحتك. سواء كنت تتطلع إلى إنشاء مكان مخصص لمعاطفك، وقبعاتك، ومفاتيحك، وبريدك، أو تريد ببساطة زيادة خيارات التخزين الخاصة بك، يمكن أن يكون رف المعاطف المثبت على الحائط حلاً عمليًا وأنيقًا. في هذه المقالة، سنزودك ببعض النصائح التي يمكنك تنفيذها بنفسك لتثبيت وتنظيم رف المعاطف المثبت على الحائط.
قبل أن تبدأ عملية التثبيت، من المهم اختيار المكان المناسب لرف المعاطف الخاص بك. ضع في اعتبارك تخطيط المساحة الخاصة بك وتدفق حركة المرور لتحديد أفضل موقع. بمجرد تحديد مكان، استخدم أداة البحث عن المسامير لتحديد مكان المسامير الموجودة على الحائط. سيضمن ذلك تثبيت رف المعاطف الخاص بك بشكل آمن ويمكنه دعم وزن المعاطف والإكسسوارات الخاصة بك.
بعد ذلك، قم بقياس وضع رف المعاطف الخاص بك على الحائط ووضع علامة عليه. استخدم ميزانًا للتأكد من أن رف المعطف الخاص بك مستقيم ومتباعد بشكل متساوٍ. بمجرد تحديد الموضع، استخدم المثقاب لإنشاء فتحات تجريبية للبراغي. سيسهل ذلك تثبيت علاقة المعاطف على الحائط ومنع أي ضرر للسطح.
بعد حفر الثقوب التجريبية، قم بتثبيت علاقة المعاطف على الحائط باستخدام البراغي. تأكد من تشديد البراغي بشكل آمن للتأكد من أن رف المعطف مستقر وآمن. إذا كان رف المعاطف الخاص بك مزودًا بقالب تثبيت، فتأكد من اتباع التعليمات المقدمة لضمان التثبيت الصحيح.
بمجرد تثبيت رف المعاطف الخاص بك بشكل آمن على الحائط، فقد حان الوقت لتنظيم معاطفك وقبعاتك ومفاتيحك وبريدك. فكر في استخدام الخطافات أو الرفوف أو السلال للحفاظ على أغراضك منظمة ويسهل الوصول إليها. يمكنك أيضًا إضافة لوحة مغناطيسية أو حامل مفاتيح لتتبع العناصر المهمة مثل المفاتيح والبريد.
لتعظيم وظائف رف المعطف الخاص بك، فكر في إضافة ملصقات أو علامات لتعيين أماكن محددة لكل عنصر. سيساعدك هذا على البقاء منظمًا ويمنع تراكم الفوضى على رف المعاطف الخاص بك. يمكنك أيضًا استخدام السلال أو الصناديق لتخزين العناصر الصغيرة مثل القفازات أو الأوشحة أو المظلات.
بالإضافة إلى تنظيم المعاطف والإكسسوارات، فكر في إضافة لمسة زخرفية إلى رف المعاطف الخاص بك. يمكنك تخصيص رف المعاطف الخاص بك بالطلاء أو الاستنسل أو الملصقات لتتناسب مع ديكورك وإضافة لمسة من الألوان إلى مساحتك. يمكنك أيضًا إضافة خطافات أو مقابض بأشكال وأحجام مختلفة لإضفاء مظهر فريد وأنيق.
في الختام، يمكن أن يكون تركيب رف المعاطف المثبت على الحائط طريقة عملية وأنيقة لإضافة التنظيم إلى مساحتك. باتباع هذه النصائح التي يمكنك صنعها بنفسك، يمكنك إنشاء رف معاطف عملي ومنظم يساعدك على تتبع المعاطف والقبعات والمفاتيح والبريد. مع القليل من الإبداع والجهد، يمكنك تحويل المساحة الخاصة بك إلى واحة أنيقة ومنظمة.
Installing a wall mounted coat rack can be a great way to add functionality and organization to your space. Whether you are looking to create a designated spot for your coats, hats, keys, and mail, or simply want to maximize your storage options, a wall mounted coat rack can be a practical and stylish solution. In this article, we will provide you with some DIY tips for installing and organizing a wall mounted coat rack.
Before you begin the installation process, it is important to choose the right spot for your coat rack. Consider the layout of your space and the flow of traffic to determine the best location. Once you have selected a spot, use a stud finder to locate the Studs in the wall. This will ensure that your coat rack is securely anchored and can support the weight of your coats and Accessories.
Next, measure and mark the placement of your coat rack on the wall. Use a level to ensure that your coat rack is straight and evenly spaced. Once you have marked the placement, use a drill to create pilot holes for the Screws. This will make it easier to attach the coat rack to the wall and prevent any damage to the surface.
After you have drilled the pilot holes, attach the coat rack to the wall using screws. Make sure to tighten the screws securely to ensure that the coat rack is stable and secure. If your coat rack comes with a mounting template, be sure to follow the instructions provided to ensure proper installation.
Once your coat rack is securely attached to the wall, it is time to organize your coats, hats, keys, and mail. Consider using Hooks, shelves, or baskets to keep your items organized and easily accessible. You can also add a magnet board or key holder to keep track of important items such as keys and mail.
To maximize the functionality of your coat rack, consider adding labels or tags to designate specific spots for each item. This will help you stay organized and prevent clutter from accumulating on your coat rack. You can also use baskets or bins to store smaller items such as gloves, scarves, or Umbrellas.
In addition to organizing your coats and accessories, consider adding a decorative touch to your coat rack. You can personalize your coat rack with paint, Stencils, or decals to match your decor and add a pop of color to your space. You can also add hooks or knobs in different shapes and sizes to create a unique and stylish look.
In conclusion, installing a wall mounted coat rack can be a practical and stylish way to add organization to your space. By following these DIY tips, you can create a functional and organized coat rack that will help you keep track of your coats, hats, keys, and mail. With a little creativity and effort, you can transform your space into a stylish and organized oasis.